

Note: Latest version of this article is available here – Install RabbitMQ on UBUNTU
What is RabbitMQ and When to Use it?
RabbitMQ is an open-source message-broker software that originally implemented the Advanced Message Queuing Protocol and has since been extended with a plug-in architecture to support Streaming Text Oriented Messaging Protocol, MQ Telemetry Transport, and other protocols.
RabbitMQ is one of the market’s most common message broker solutions, provided with an open-source licence (Mozilla Public License v1.1) as the Advanced Message Queuing Protocol implementation. It is actually relatively easy to use and get started, built using the Erlang language.
All put together, the core functionality explained expands to cover a multitude of areas, including-but-not-limited-to:
- Allowing web servers to respond to requests quickly instead of being forced to perform resource-heavy procedures on the spot
- Distributing a message to multiple recipients for consumption (e.g. processing)
- Letting offline parties (i.e. a disconnected user) fetch data at a later time instead of having it lost permanently
- Introducing fully asynchronous functionality to the back-end systems
- Ordering and prioritizing tasks
- Balancing loads between workers
- Greatly increase reliability and up-time of your application
- and much more
You can learn more about RabbitMQ on their official site https://www.rabbitmq.com/features.html.
STEP 01 – Installing RabbitMQ
RabbitMQ packages are distributed both with CentOS / RHEL & Ubuntu / Debian based systems. However in this article i’ll update on how to install on Ubuntu 20.04 LTS.
Note : Based on RabbitMQ’s official documentation on https://www.rabbitmq.com/install-debian.html
We will be creating a bash script for the automated installation of RabbitMQ. We will create a bash script file with name rabbitmq.sh. You can choose to give any name here.
sudo nano rabbitmq.shThen copy the below script and paste in the nano editor.
#!/bin/sh

## If sudo is not available on the system,
## uncomment the line below to install it
# apt-get install -y sudo

sudo apt-get update -y

## Install prerequisites
sudo apt-get install curl gnupg -y

## Install RabbitMQ signing key
curl -fsSL https://github.com/rabbitmq/signing-keys/releases/download/2.0/rabbitmq-release-signing-key.asc | sudo apt-key add -

## Install apt HTTPS transport
sudo apt-get install apt-transport-https

## Add Bintray repositories that provision latest RabbitMQ and Erlang 21.x releases
sudo tee /etc/apt/sources.list.d/bintray.rabbitmq.list <<EOF

## Installs the latest Erlang 23.x release.
## Change component to "erlang-22.x" to install the latest 22.x version.
## "bionic" as distribution name should work for any later Ubuntu or Debian release.
## See the release to distribution mapping table in RabbitMQ doc guides to learn more.
deb https://dl.bintray.com/rabbitmq-erlang/debian bionic erlang

deb https://dl.bintray.com/rabbitmq/debian bionic main
EOF

## Update package indices
sudo apt-get update -y

## Install rabbitmq-server and its dependencies
sudo apt-get install rabbitmq-server -y --fix-missing
Once pasted save the file using ctrl+o & ctrl+x. and then run the script. It will install the Erlang and RabbitMQ.
sh rabbitmq.shOnce RabbitMQ has been installed, you can check its status using below command.
sudo service rabbitmq-server statusOutput :
[email protected]:~$ sudo service rabbitmq-server status
● rabbitmq-server.service - RabbitMQ broker
     Loaded: loaded (/lib/systemd/system/rabbitmq-server.service; enabled; vendor preset: enabled)
     Active: active (running) since Thu 2020-09-10 10:19:11 UTC; 0h 2min ago
   Main PID: 41583 (beam.smp)
     Status: "Initialized"
      Tasks: 85 (limit: 1164)
     Memory: 86.0M
     CGroup: /system.slice/rabbitmq-server.service
             ├─41583 /usr/lib/erlang/erts-11.0.4/bin/beam.smp
             ├─41142 erl_child_setup 32468
             ├─41217 /usr/lib/erlang/erts-11.0.4/bin/epmd -daemon
             ├─41217 inet_gethost 4
             └─41218 inet_gethost 4

Sep 10 10:19:09 ip-x.x.x.x rabbitmq-server[41083]:   ##########  Licensed under the MPL 2.0. Website: https://rabbitmq.com
Sep 10 10:19:09 ip-x.x.x.x rabbitmq-server[41583]:   Doc guides: https://rabbitmq.com/documentation.html
Sep 10 10:19:09 ip-x.x.x.x rabbitmq-server[41583]:   Support:    https://rabbitmq.com/contact.html
Sep 10 10:19:09 ip-x.x.x.x rabbitmq-server[41583]:   Tutorials:  https://rabbitmq.com/getstarted.html
Sep 10 10:19:09 ip-x.x.x.x rabbitmq-server[41583]:   Monitoring: https://rabbitmq.com/monitoring.html
Sep 10 10:19:09 ip-x.x.x.x rabbitmq-server[41583]:   Logs: /var/log/rabbitmq/[email protected]
Sep 10 10:19:09 ip-x.x.x.x rabbitmq-server[41583]:         /var/log/rabbitmq/[email protected]_upgrade.log
Sep 10 10:19:09 ip-x.x.x.x rabbitmq-server[41583]:   Config file(s): (none)
Sep 10 10:19:11 ip-x.x.x.x rabbitmq-server[41583]:   Starting broker... completed with 3 plugins.
Sep 10 10:19:11 ip-x.x.x.x systemd[1]: Started RabbitMQ broker.
You can also check the installation log at this location – /var/log/rabbitmq
# Replace [email protected] with your file name
cat /var/log/rabbitmq/[email protected]
STEP 02 – Adding and Managing Users
Default Virtual Host and User
When the server first starts running, and detects that its database is uninitialized or has been deleted, it initializes a fresh database with the following resources:
- a virtual host named / (a slash)
- a user named guest with a default password as guest, granted full access to the / virtual host
It is advisable to pre-configure a new user with a generated username and password or delete the guest user or at least change its password to reasonably secure generated value that won’t be known to the public.
#Create a new user. Replace rabbituser and PASS**** as par your choice.
sudo rabbitmqctl add_user rabbituser PASS****

# Add Administrative Rights
rabbitmqctl set_user_tags rabbituser administrator

# Grant necessary permissions
sudo rabbitmqctl set_permissions -p / rabbituser ".*" ".*" ".*"

# Verify permissions
sudo rabbitmqctl list_permissions


########################################################################

# It is danger for default user and default password for remote access
# In order to change password
rabbitmqctl change_password guest NEWPASSWORD

# For Deleting guest User
rabbitmqctl delete_user guest
Step 3 : Managing RabbitMQ
RabbitMQ is very simple to get started with. Using the instructions below for your system, you can quickly manage its process. RabbitMQ Management Console is one of the available plugins that lets you monitor the [RabbitMQ] server process through a web-based graphical user interface (GUI). Using this console you can:
- Manage exchanges, queues, bindings, users
- Monitor queues, message rates, connections
- Send and receive messages
- Monitor Erlang processes, memory usage
- And much more
To enable RabbitMQ Management Console, run the following command.
# enable rabbitmq management plugin
sudo rabbitmq-plugins enable rabbitmq_management
# To restart the service:
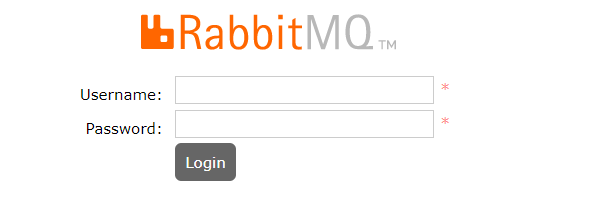
sudo service rabbitmq-server restartOnce you’ve enabled the console, it can be accessed using your favourite web browser by visiting: http://your-server-ip:15672/
It will ask you to login. You can use the previously created username to login.
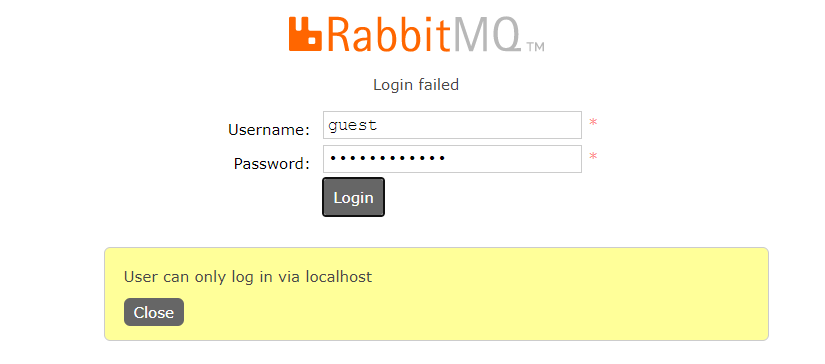
From the version 3.3.0 onward if you will try to login via browser using default user guest it will give you an error “User can only log in via localhost“.
Once you logged in successfully you will have your management dashboard.
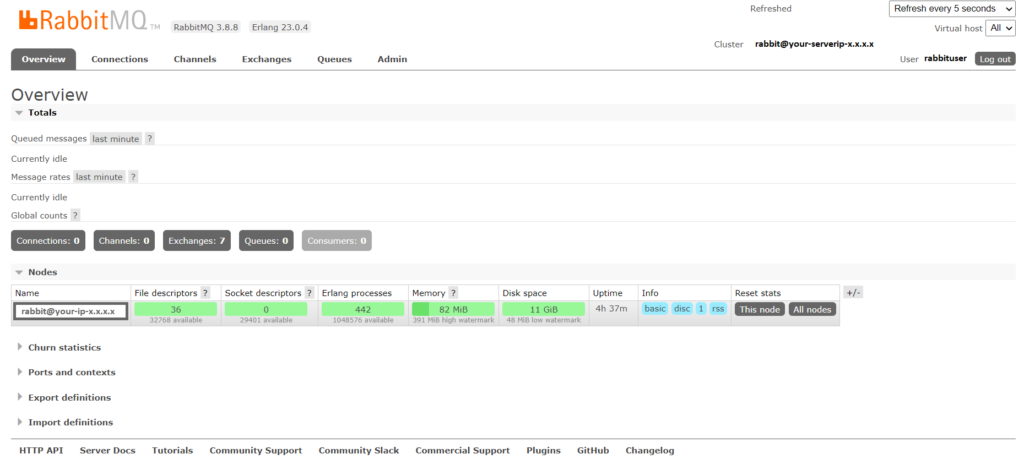
RabbitMQ by default runs with its standard configuration. In general, it does not require much tempering with for most needs as long as everything runs smoothly.
Extra : Managing RabbitMQ
# To start the service:
sudo service rabbitmq-server start

# To stop the service:
sudo service rabbitmq-server stop

# To restart the service:
sudo service rabbitmq-server restart

# To check the status:
sudo service rabbitmq-server status
Happy Messaging !!!
I do not watch Erlang’s installation, How to do this?. What is the command?,